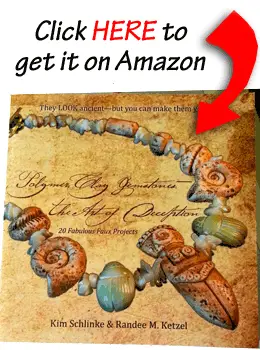
"Polymer Clay Gemstones- The Art of Deception" by Kim Schlinke & Randee M. Ketzel
-----
Part 2 of the Video Interview on April 5, 2014
Home › Books! › Polymer Clay Gemstones - Part 1 › Part 2
"Polymer Clay Gemstones - The Art of Deception" artists and authors Kim Schlinke and Randee M. Ketzel video chat Part 2.
Andrea: I think it was a wonderful novel. I had it on my bedside table for many weeks and I reread it a lot of times and it's still there a lot of days.
I keep picking up different parts of it, opening it up and having a fun time when I read it. And Randee, you also mentioned that Peele was sort of modeled after Emma Peel of the Avengers, my favorite
Randee: What girl growing up in the 1960’s did NOT want to be Emma Peel?. I mean, come on, she was great.
Andrea: Give me the leather man! Incredible.
Randee: That was 40 pounds ago for me.
Andrea: There are things that we’re just NOT going to discuss here.
Randee: One of the things that’s been very gratifying to both Kim and I is that no matter what people feel about the narrative itself, everybody loves the techniques, and the projects and the thought that went into this. And so that’s been extremely gratifying.
And yes, there are a lot of techniques that did not make it into the book.
How did Kim and Randee decide which techniques would go into "Polymer Clay Gemstones"?
Joey: So to that end, how did you decide on which techniques and which order that they would appear?
Kim: Well, I think that the ‘which’ came from the ones that came out best as we were working. We have a wonderful rock shop here. I just went in and just started picking up pieces. That’s where the blue lace agate came from. I’d never seen that stone. I bought a slab of it. I have a box of rocks that I purchased that I used as inspiration, because I wanted them to be as accurate as possible.
I’ve actually gone back into the rock shop with some of the samples of the polymer clay ones. They were pretty surprised that they’re not rocks. I’ve fooled a couple of people in bead stores…and that’s pretty neat.
As far as the order that we put them in? We tried to put the techniques that we would reference back through the rest of the book in the beginning (like the metal techniques). So that when we’re doing a project with the stones you’ve already been through that . And then we put some of the related techniques together. The rhodochrosite and the blue lace agate are sort of similar in their construction its basically a slab cane, for lack of a better word. It was a progression of learning.
Randee do you have anything to add on that?
Randee: No. I think that says it perfectly. We kind of sweated the order of things as they went into the book, to make it a logical flow throughout. And we had a great deal of help from a fabulous publisher, Sara Jane Helm, of Polymarket press. She is in her own right a many times published and a wonderful polymer clay artist.
What's their favorite polymer clay technique from the book?
Andrea: You’re probably like most artists, whatever you’re working on currently is your favorite project, but had to, what would you choose as your favorite technique out of the book? Kim?
Kim: My absolute favorite is the ivory. I am totally against anyone making new ivory. But old ivory is so beautiful and so fascinating. I’ve spent I don’t know how long, any time I would come across a piece of antique ivory, just examining it, looking for the subtle details. There have been ivory formulas before, but I just wasn’t satisfied with them. Because people would look at my project and say, “Wood”. And I’d think, “No, ivory!” I realized that ivory is basically hair. Its like strands of hair bonded together. But the lines in there are not even and straight. And when I cut into that and we baked it and sanded it I thought, “There it is!” It seems subtle, but it’s not as flamboyant as some of the other techniques. But that makes it wonderful for me.
Randee: And I think Kim, that you’ve tended to shift your ivory more towards the yellow and the aged look. Not many people have done that. And not many people have grasped the fact that ivory really is pretty yellow.
Kim: I agree. That was always my fuss with all of the other formulas that I’ve tried.
Randee: I’m going to have to say that my favorite technique was the barbarian bracelet, because I LOVE opals. And I’ve got about 6 different formulas that I use for it. The one that I used in the book was one of my very favorites because it’s really a gaudy formula. It really shows that flash and fire. And we’re doing a little different from other traditional polymer clay opals formulas in that we’re incorporating iridescent dichroic film on the back. And that, I think, makes all the difference. I love the intricacies of the bronze settings combined with the opal. That’s one of my favorite pieces and techniques.
Andrea: Well you guys have been responsible for me getting a heat gun as you know. And so that opened up a whole new world. I don’t do jewelry much anymore, I’ve really been going with the sculpts. So what I went crazy about was all these techniques. I’ve been using these techniques and applying them to my sculptures. Kim, the blue lace agate technique is one of my favorite stones, I’ve known of it for a long, long time. And when I saw you had that technique and the rhodocrosite which is from my own country, Argentina, I’ve never seen that anywhere. I just love the book. I’m using it for everything. I can’t wait until you do another one.
Kim: We tried to do things that weren’t done before. I mean, ivory’s been done, but it’s sort of a new formula.
Andrea: So to that end I’m going to show off a little bit. Here’s my latest. This is the blue lace agate, but I used different colors. It’s the island of Maui, its not done yet. And I’m going to put one of my famous lights in there. And so this is done in translucent as well, so it’s going to shine through and up. But I have to do the inside its going to have turtles and coral and things like that. And its waterproof so if you do want to fill it up, and the LED lights are submersible, so whenever I get it done I will post it. But see that, that’s your technique. I sliced it and put it on armature and then textured it out with a tool and then it gave me the waves. Isn’t that nice, what you did?
Randee: I haven’t really worked in large pieces, but I’m moving that way.
Joey: But isn’t that another good thing about a book like this that gives you a technique that then you can make that technique your own. Instead of just doing what the project is. Then taking the technique and applying it to something else and having success by where you’re still bringing in everything that Kim developed through the research that she did on the actual stone itself.
I love it. You guys are rock stars.
Andrea: I used your other one for the stone on my box with amaryllis. I used one of your techniques for the stone and it looks gorgeous. But it looks nothing like what you have in the book. But it’s the same technique, just using a bit different formulation. And that’s the one that got accepted for the exhibition that I’m going to go after this. So you see what you guys are doing to me. I thank you. I couldn’t have done it without you.
Randee: One of the differences between Kim and I is that I’m more focused on projects and she’s more focused on formulas. You would not believe how much she sweats these color formulas. She would come over and bring samples and say, “I ruined another one.” I think particularly with the rhodochrosite you worked on those formulas for two months. Getting it right and getting it re-creatable.
Kim: I’ve got a pile of pink scraps left over from the rhodochrosite, I pick them out when I need orange, purple…I keep working them back in. I think hardest one to develop - and it seems nuts because it should be pretty straightforward - was the carnelian. Because I started out in the very first carnelian, before I even thought of doing the book was an ancient Roman necklace, which actually did make it in. But I was working from the browser, and copying those colors. So when I actually got some carnelian, it was all wrong. So it was back to the drawing board. So I also have a bag of rust colored scraps left over from the carnelian.
Joey: Can I have your scraps please?
Kim: They’re probably pretty dry by now. But I do have a certain perfectionist side to me.
Andrea: I think it shows. All the work that you’ve put into it, it definitely shows that you’re so careful about it. I go back for even just one color, if I need a light blue or something like that to capture the essence of the stones…It can be applied to anything. It can be tweaked. And I think that is so valuable. All the time and effort that you put there and all the scraps that you have saved us from all those scraps ourselves. And that’s a wonderful contribution.
When Did You Fall in Love with Scarabs Randee?
Joey: You and Nora both know that I have a huge affinity for scarabs or beetles. And I’d like to know the story of the necklace that you have on and how it got chosen to be in the book.
Randee: There’s a lot of things that fed into this. One is that when I was in kindergarten in Florida I went into the library one day and there was a copy of the National Geographic with the treasures of Tutankhamen in it. I saw that pectoral with the green scarab in the center and just fell in love with it. So fast forward about 30 years, I’m a jeweler, I’m working in Florida for an antique dealer. He brings me about a dozen Tiffany glass scarabs. And he says, “Make these into a necklace for me”. Well, there were 13 scarabs, and only 12 of them would go into the necklace. So he told me to keep the 13th one for myself, just as a gift. And that scarab looks just like the scarabs in this necklace. So that’s where that inspiration came from.
I’ve always loved Tiffany glass. And you can reproduce it so easily in polymer clay. It really does look like it. So there you have it.
Tiffany sort of initiated the Egyptian Revival movement in about the 1900’s.This necklace is not based on an actual Egyptian necklace, because they were much more elaborate and much more detailed and they incorporated a lot of stones and inlay as well. This is pure Egyptian Revival which is kind of fake Egyptian but its very beautiful and I love it.
Kim: That is one of my favorites of Randee’s. I’d really like to be able to take the time to make some of Randee’s projects out of the book.
Randee: One of the things that I’ve really loved seeing is people taking projects out of the book and changed them up. Like Kim Koval Keene in Kansas has done some beautiful work with these projects. She has made them uniquely her own. And that’s what we were striving for. Take the techniques and run with it.
Kim: I really kind of hate to see people just copy. Not that it’s not ok to copy work as a starter or to get the feel of it. But there’s so much more that you can do with it. Its like this is our little part of the creativity. We’re putting it out in the world for people to adapt and use like Andrea’s using it in very interesting ways. It’s not just about the jewelry. I’m really pleased to see that people are expanding and using their own imaginations with it.
Randee: So Joey, how about expanding it and using it to make a giant purse?
Joey: Actually I was just thinking about an ivory purse.
Kim: That would be pretty.
Andrea: Your twigs that you used for the bracelet? I’ve done those and they’re going to go into a sculpt of a salamander. I usually don’t say what I’m going to do. But that was the idea. A little salamander on burning logs. And I’m going to put light underneath, so it will be like a night light. The logs are done, and they’re gorgeous.
Randee: I was directly inspired by Kim Cavender who does beautiful twigs. But I wanted to do a little different, so that’s how that technique evolved for us.
Nora: In your book there are a lot of tips and tricks. But to me I think that the best trick of them all that was totally worth the whole cost of the book was where you take the gemstone and smoosh it into a wad of clay and then cut around it to make the bezel. Its one of those things that when you see the technique you say, “why didn’t I think of that!” So much easier than to wrap stones with strips of clay.
Randee: I used to do that exact technique of wrapping strips around the stones. And one day I got frustrated. I took the clay, punched a hole in it and stuffed the stone in it. And then Nora you influenced me a lot. You started out by cutting very rough shapes then cutting in closer and closer. What occurred to me as I was thinking about it was don’t put the stones into the clay, just move the clay away.
Nora: Very interesting. I didn’t know that I had an influence on that. I just wish that I’d had the a-ha moment to just take it a step further.
Randee: My a-ha moment was thinking that anything safe at 300 degrees is safe in the clay. How many organic materials are safe to 300 degrees. The answer is…just about all of them. I probably wouldn’t risk a good opal on a bet. But of a pearl is safe at 300 degrees, almost everything else is too. And I don’t think many people realize this.
What MUST You Do If You Want to Publish a Book of Your Own?
Nancy: One thing that I was curious about is the process that you went through putting together the book. I know that lots of people think about publishing a book. But it can be really intimidating. What were your first steps and what were the most important things to consider when you’re doing it.
Randee: I think that the most important thing that anyone can do who wants to publish a book on polymer clay is to find a good, small independent publisher. And take your work to them and work with their guidance.
You may not know this, but initially we started off with a large publisher who offered us a contract to do this book. They brought a new editor on board who decided that they weren’t doing any more polymer clay books. At that point they released all the materials back to us. So we had this book. Well Kim happened across this photographer who happened to know this publisher who was named Sara Jane Helm.
Working with her was day and night difference from working with a large publisher. The artistic control was completely different, the structure was completely different. It was a wonderful, wonderful experience working with Sara Jane. Because she produced exactly the kind of book that we wanted to do didn’t dumb it down for anything.
So I say, the best thing that you can do is find yourself like Sara Jane who will step you through this process, start to finish. Everyday will hold your hand. It’s a great experience. And its not that hard. Again, a lot of people probably don’t know this but all of the step by step photography was done with my little point and shoot camera. And Sara Jane went through and cleaned up all of those 300 something photographs to make them look wonderful in the book. But it didn’t take any special techniques or equipment. You need a camera, workspace and a will to do it. And that will get you through it.
If you’re thinking about a book, by golly go after it. The publishing landscape has changed so much. If you don’t want to do a print book, which is expensive, you can do a digital book. Like Helen Briel did. And its been an enormous success for her. Don’t be afraid to do it. If I can do it and Kim can do it. Anybody can do it.
When is the sequel to "Polymer Clay Gemstones - the Art of Deception" coming out?
Joey: So speaking of that, when does the sequel to this book come out?
Randee: What do you think Kim? A year?
Kim: Let’s let this one kind of run its course. But I’ve got some Pinterest boards that are kind of percolating with different things that I’ve come across. Pinterest is really good, and really evil. It can be a huge time suck.
I’d like to go back to Nancy’s question. I found that for me, it was best to write with a partner. Randee and I are both introverts, so we don’t get in each other’s face. And having that responsibility to someone else really was a good push.
Randee: It definitely gave us a deadline.
Kim: Yes. Because the first time that we did have a deadline when we were with the traditional publisher. It made us finish on time. And then when that all fell through we were sad for a few minutes. But then we said, “Wait a minute, we have a complete book!” That’s the hard part, getting that whole thing finished. That’s something that I would do if you’re interested in creating a book. Set yourself an end date. Or do one chapter a month. Make some kind of schedule.
Also start with an outline. Maybe about a quarter of the way in we sat down and asked ourselves, ‘what do we want to put in?’ Now some of them fell off because there just wasn’t room. Starting with a good outline and a good plan really helped. And just keep at it.
It was really a huge learning experience for me too, as far as learning to write better. Just developing those techniques gave me a purpose to my clay. I wasn’t just making little baubles that lurked around or making more jewelry for myself. I really enjoyed having a reason to clay. It was like, ‘oh, let’s work on this next.’
Randee: It really helped for both of us to be playing off each other and saying, ‘have you finished that yet?’ It made you say, ‘oh yeah, I’d better finish that…like NOW!’ It helps to have a partner.
Kim: I’ve often referred to Randee as my ‘clay wife’. Because she keeps me organized and on schedule.
Randee: We have skills that compliment each other very well and it just happens to work that way. So if you have someone who’s enough like you to be totally opposite…you’ll probably do very well in your writing partnership.
Andrea: Maybe a little healthy, friendly competition.
Randee: In a way.
Kim: I just never really felt competition with Randee. It was a lot more of a complement rather than competition. It was definitely a sense of responsibility. I didn’t want to drop my half of the coffin so to speak. But I never really feel competition with her, which is probably why we’re such good friends.
Randee: We’re interested in very different ways of approaching polymer clay. Kim is extremely methodical and scientific. She tests and she tests. I just throw some things together. It’s like throwing something against the wall and seeing if it will stick. And if it works, that’s great. And if it doesn’t, try something else. But our styles really complement each other very well.
Joey: So who came up with the leopard skin jasper?
Randee: That was mine. And that was a completely fortuitous technique. I was playing with some scrap one day and took a razor blade and sliced across it. And I thought, “Hey, there’s these little concentric rings here. They are so cool looking. That actually looks like a real stone!” If you take that serendipity and apply color theory to it, suddenly you can reproduce anything.
One of the things that did not make it into the book because it was so similar to the leopard skin jasper was malachite. You can use this same technique for malachite and it is gorgeous. It looks like the real thing. I’ve seen many techniques for malachite that you cane, but this is so much simpler and it will look different for each one. And that’s what you’re really aiming for.
What's going in the next book?
There are a few techniques that did not make it into the book and they’re what we’re working on now. Kim is going to perfect the formula for tourmaline very, very soon…right?
Kim: In my wanderings on the internet I came across a watermelon tourmaline bracelet. And its was just slices that were polished on the ends. And I was thinking that I had to have that. So one of these days I’m going to sit down and perfect it. That’s a beautiful, beautiful stone.
Fire agate is another one that has given me fits. And that was another one that I just couldn’t finish to my satisfaction. That’s why it didn’t make it into the book. But that doesn’t mean that I won’t eventually get it. But that’s probably a possibility for the next go around.
Randee: One of the things that made this book possible was that so many materials have been developed over the last 10 years since the last book on faux techniques came out. And we wanted to take advantage of that. There are so many materials out there now that make pure translucents really possible in polymer. And so I’m excited about where this is going. I see this getting better and better across the years.
I have not tried this new one that you have talked about Nancy. It’s an additive to translucent clay to make it really transparent. (OxyClay!)
Joey: I read about it too!
<Everyone laughs>
Nancy: That manufacturer is going to be really, really rich and is going to take the whole polymer clay world by storm.
Randee: No kidding. That’s the holy grail of polymer…truly transparent clay. I just can’t wait to try that stuff.
Joey: What’s your favorite type of clay to use?
Randee: Premo. Without a doubt.
Joey: Kim, are you the same?
Kim: I really like Premo. Although I’m interested in doing some work with some of the Pardo translucent. Because it is quite clear. But I find with the beeswax additive it tends to have a little bit of a plastic look. So I’ll be looking for a workaround for that. I need to just suck it up and order a big enough pile so I don’t have to worry about it being so precious. Usually I can find it in ones or twos at the local craft stores. They don’t stock it in big quantities that you need for tearing through it and experimenting.
So that’s one that I’m interested to try and see what we can do with that as well.
Randee: Joey, I think that Premo is my favorite for several reasons. 1) Its accessible. 2) Its on sale a lot. 3) Its available in bulk.
But mostly because it is the most color saturated of all the clays that I have tried so far. And it comes in an artist palette. So as somebody who decades and decades ago used to paint it makes color mixing more intuitive for me. I’m used to referencing those colors in painting so its easier for me to do it in clay. It’s a great all around clay. Its very strong.
And I will say that the people at Polyform have been very, very good to us. When Iris Weiss heard that we were writing this book, she immediately volunteered to supply all sorts of things for us to experiment with. We thought that was just wonderful. But Iris is a pretty wonderful person to begin with.
Joey: But that is helpful because that means that the corporations that manufacture the raw material are supporting what you’re doing on an educational front as well.
Kim: Really it’s a two way street. Because everybody that picks this up is going to see Premo. But it can be a beautiful thing. You should have seen our two very excited faces when we got the Iris box. It was like Christmas plus.
Randee: When we met Iris at the Houston retreat, I practically hugged that woman to death.
Joey: Yeah, but I got the earrings! And they’re rhodochrosite by the way, for those of you that are looking.
Andrea: She is just so smug about those earrings, and I don’t blame her.
Joey: Because it was through the graciousness of Kim who came up to me and said, “You’ve been so kind to us. We’d like you to have these.” Then she handed them to me. I was overwhelmed. I was bad. I didn’t even write a thank you note. So publicly I’m saying thank you so much for all that you all have done. Not just for the earrings, but for opening up my personal world of polymer. I really appreciate what you’ve done.
Randee: Joey, I just can’t believe that you haven’t been working in polymer clay for years, because you are amazingly good at it.
Joey: I feel like you do. I can hardly go a day without touching it and I’m feeling like I’m having withdrawl symptoms. My little brain wants to do something. I’ve got ADD now, and I never had it before.
Randee: You know what’s weird, several projects in this book came to me in a dream. I would dream about them and I would wake up the next morning and go “Oh, that’s what I want to do for the book!” That’s how the barbarian bracelet arrived. Its pretty bad when you’re dreaming about this stuff.
Nancy: Its getting to the end of our hour here, so we should probably wrap it up. One last question, when’s the sequel coming out?
Randee: We’re thinking about a year from now. Depending upon how things go. Thanks to the book I do have some classes that I will be teaching at the International Polymer Clay Retreat in August. So that’s going to take some time. I’m so thrilled. I feel like I’ve been invited to sit at the big kids table.
But yes. We’re aiming for about a year from now before we wrap up another book. Probably a smaller one.
Joey: And electronic?
Randee: A smaller book could be electronic. And that is something that we are looking at very seriously. Because right now as it stands, at 206 pages we’re the biggest instructional book on polymer clay ever published. I’m not sure about that, but I think that’s about right. We’re aiming for something a little smaller, maybe 120 – 150 pages. And that’s totally doable as a digital book.
Nancy: Well everybody, say goodbye!
Everyone: <Goodbyes and thank you’s all around for about 5 minutes. Plus talk of wine being uncorked somewhere in Texas…>
|
|
|
What Would You Like to Ask Kim and Randee?
Home › Books! › Polymer Clay Gemstones - Part 1 › Part 2
